Violin Setup - What we do and why it is so important.
What's involved with Setup ?
Setting up is the final adjustment of the violin. It affects the pegs, the nut, the fingerboard, the bridge, the soundpost, the tailpiece and tailgut and even the end button. We also include the strings as they can make a big difference to the final sound of the violin. Many violins that we see are poorly setup and it's quite surprising how a few adjustments in the right area can improve both a violins tone and also its playability.
Many general music shops just take a basic student instrument, fit the bridge as supplied, tune the violin and hand it to the customer. Often the strings are too high, the pegs don't turn easily or slip, the bridge curve is too flat and the poor student spends most of their time fighting with the instrument rather than enjoying their playing.
The Tuning Pegs
The set up and adjustment of the pegs has a huge effect on the ease of tuning of a violin and also how well the violin stays in tune. The pegs are tapered and fit into a tapered hole in the peg box. The taper, usually 30:1, is cut in the peg box with a reamer. The pegs are cut with a peg cutter to the same taper.
In an ideal world the peg would then fit perfectly into the hole and turn easily and would not slip. Unfortunately this seldom happens, wood will often distort under the cutter as it is being machined and once the cutter is removed will spring back, leaving a taper that is not quite accurate. Our job is to make minor adjustments to the peg & sometimes the hole so that the peg fits snugly into the hole on both sides of the peg box.
Many new factory violins are quite badly set up and the pegs very seldom fit all the way into the peg hole, you can see this in the picture to the right.. It's not at all unusual to find pegs that really only fit on one side of the peg box and the other side barely meets the edge of the hole. In these circumstances we reamer the hole out a little more and adjust the thickness of the peg with a knife until both sides fit and the end of the peg is just slightly proud of the peg box. It is important that as much of the peg touches the lining of the hole as possible, that way the peg offers the maximum resistance to turning with the minimum inward pressure into the tapered hole.
Once the peg is fitted correctly we add a little Hills Peg Paste as a lubricant so that the peg turns smoothly. You can use soap instead but we find that Peg Paste works just that little bit better, though soap was what luthiers were using long before the advent of specialised pastes.
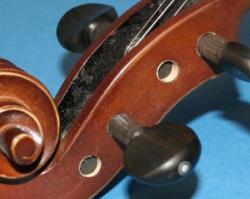
Pegs not fitting all the way through the hole
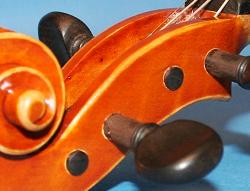
Pegs fitted correctly.
The Fingerboard and Nut
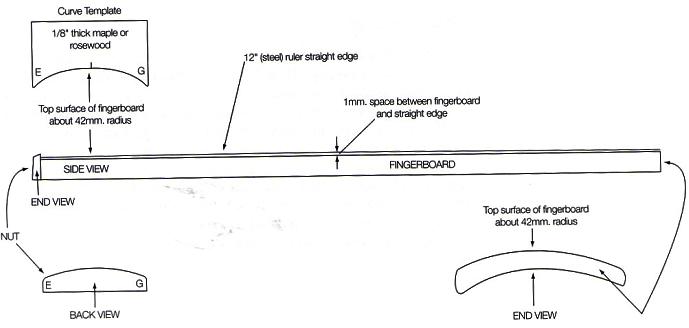
The fingerboard is usually made of Ebony and glued to the neck, it provides most of the strength of the neck assembly. We check every violin to make sure that this joint is secure. Sometimes a shock in transit can break some or part of this joint, in these cases we unglue the fingerboard, clean the surfaces and re-glue it back into place. The top surface of the fingerboard is curved if you look across it and there is a slight dish to the surface when looking along it. These curves are necessary to help the player stop a string and also to prevent a string buzzing, this happens when the vibrating part of the string touches the fingerboard when it shouldn't. We check each fingerboard and if necessary plane them to the correct curve.
We also check the angle of the neck and check that the bridge height is correct. If the neck angle is too far out then we have to unglue the neck and reset it to the correct angle. On a budget student violin this would probably cost more to repair than the violin is worth and those violins end up as firewood. It doesn't happen very often thank goodness.
The Nut or Top Nut
The nut is a tiny piece of ebony at the end of the fingerboard nearest to the pegs. It's purpose is to support the strings, keeping them the correct distance apart and the correct height above the end of the fingerboard. The nut also helps to guide the strings to the pegs.
Most new violins have the nut incorrectly adjusted and as a result the strings are set too high. This makes the violin more difficult to play as you need to press quite hard to force the string against the fingerboard.
The Bridge
The bridge is a very important part of the violin, if it is wrongly made or badly fitted the violin can be virtually unplayable.
The bridge holds the strings at the correct height above the fingerboard and the correct distance apart, it also transfers the vibrations of the string to the sound box of the violin.
First we check that the feet of the bridge fit correctly to the curve of the belly of the violin, we adjust this using a knife and finally some abrasive paper. The feet should fit snugly to the curve with no gaps showing.
Once the feet have been adjusted we fit the E and G strings and check the heights of these strings at the end of the fingerboard. If the strings are too high, they often are, we increase the depth of the string notch until these two strings are held at the correct height. We then mark the top edge of the bridge with the correct curve to match the fingerboard and then trim the bridge to that curve.
At this time we also thin the bridge as required and make minor adjustments to the kidney and heart holes to tune the bridge. Once this is done we can fit the bridge and the rest of the strings and do an initial check of the soundpost
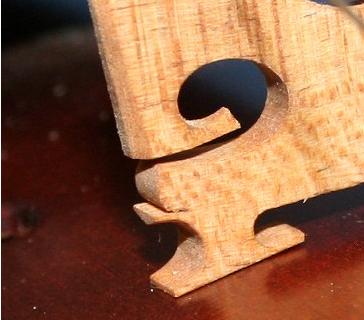
A badly fitted bridge foot, notice the large gap at the inner end of the foot
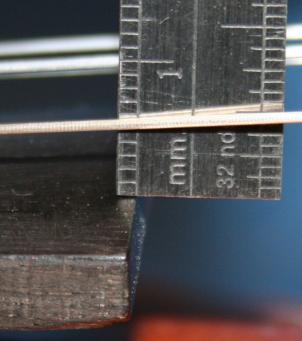
Measuring the height of the G string at the end of the fingerboard.
The Soundpost
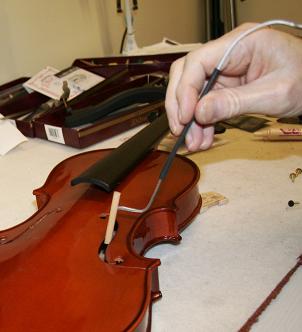
The soundpost is perhaps the most mysterious part of the violin. It's purpose is easy to understand but getting it in the correct place can be the most difficult part of setting up a violin. The soundpost is a short length of pine dowel, which fits between the front plate or table and the back plate inside the violin. It acoustically couples the front and back plates and fits close to and slightly behind the foot of the bridge closest to the E string. The sound post is not glued into place but is just wedged between the plates and is held there by the downward force of the strings pressing on the bridge and slightly squashing the violin.
The Italian luthiers called it the heart of the violin as its size, shape and position changes the whole tonal response of the instrument. There is no definitive position for the sound post but somewhere in the range of 1 to 6 mm behind the bridge is usual. A very strident violin would usually have the post set back towards the 6 mm position whereas a quiet violin might have it a little closer. To compound the problem, the length of the soundpost and how tightly it fits can also affect the tone. Needless to say, adjusting the soundpost can take up an appreciable amount of the setting up time.
The Tailpiece
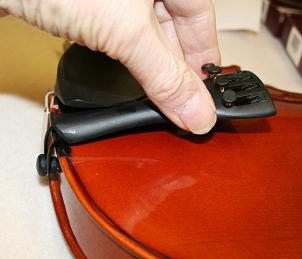
The tailpiece is held in place by a tailgut, nowadays made of nylon, which loops over the end button. The ends of the strings fit into the other end of the tailpiece. We check the end button to make sure it fits correctly and that the tailgut is the correct length. Once the tailgut has been set to the correct length we cut off the remaining ends so that they won't touch the belly of the violin and maybe cause a buzz. If the tailpiece includes fine adjusters we put a drop of very fine oil on the threads. We find this makes tuning the strings so much easier.
We have seen some violins where a standard wooden tailpice has been fitted with four screw-on fine adjusters. We don't like to see this for several reasons. The screw-on adjuster was intended just for the E string so the claw that holds the string is not really wide enough to hold the ends of the thicker strings. It needs to be opened out. Four adjusters add quite a lot of extra weight to the tailpiece but more importantly they move the end of the string closer to the bridge. There is an optimum distance between the end of the string and the bridge, which can have a marked effect on the sound quality of the violin. With four screw on adjusters it's not possible to achieve this optimum distance.
We prefer to see a tailpiece with integral adjusters. They weigh very little more than a standard wooden tailpiece but more importantly, because the adjusters don't stick out beyond the end of the tailpiece, the optimum string length is maintained.
Playing In
We like to spend some time playing the instrument after setting it up, this helps to bed down the new strings, it checks that the bridge curve is correct, the string heights feel right and whether the sound post needs a final tweak. This part, especially on the more expensive violins, is often spread over several days. and includes a session with a Tonerite vibrator. Finally when we think it can't be made any better we photograph it and put it on the web site for sale.
I hope that answers a few questions about setting up our violins, We can't tell you everything, there isn't a web page big enough for that, but this should give you a good idea of the work involved and a few pointers for you when you come to examine a violin that you are planning to purchase.
